Thursday, July 14, 2011
Sweet Memories
I just popped a pan of Peanut Butter Chocolate Chip Bars into the oven. These little treats were my mom's signature dessert while I was growing up. When I needed to bring a snack into school or friends spent the night or my parents visited me at college, these yummy cookie bars were there too. Tehy seem like the perfect treat to make my kids smile on a sunny summer day!
Friday, March 18, 2011
Family Dinners: Innovating with Kids
I believe very strongly in the family dinner table. Easy for me to say, right? I don't have teenagers with ball practice and dance recitals, my husband and I don't have long commutes for work, and I don't mind cooking. How hard could it be for me?
Although family dinners at the table can be challenging, they are always worth it. I remember in middle school one teacher had a poster that read: "What is easy is not always right; what is right is not always easy."
Many of my family's holiday meals are hosted at my aunt and uncle's house, so I purchased an extra booster seat to keep at their house. It is one less thing to pack up and drag along on busy holidays. When I bought this booster seat, I neglected to notice one important piece: it didn't have a belt to buckle in the kiddo.
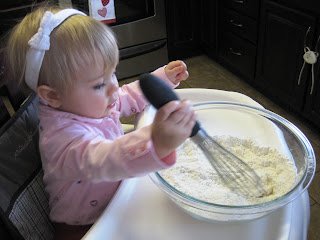
Fast forward to Thanksgiving 2010...Anna was 10 months old. She joined us at the dinner table as soon as she could reasonably sit in her high chair; however, she was ready to topple out of this booster seat. This is the point when our innovation kicked in and we solved the problem...

Although family dinners at the table can be challenging, they are always worth it. I remember in middle school one teacher had a poster that read: "What is easy is not always right; what is right is not always easy."
Many of my family's holiday meals are hosted at my aunt and uncle's house, so I purchased an extra booster seat to keep at their house. It is one less thing to pack up and drag along on busy holidays. When I bought this booster seat, I neglected to notice one important piece: it didn't have a belt to buckle in the kiddo.
Fast forward to Thanksgiving 2010...Anna was 10 months old. She joined us at the dinner table as soon as she could reasonably sit in her high chair; however, she was ready to topple out of this booster seat. This is the point when our innovation kicked in and we solved the problem...

Look closely. Do you see it? My scarf is anchoring Anna to the chair so she can enjoy some dinner too! The first time we tried this trick was with Andrew at a wedding. It was a belt that time and it worked perfectly.
Even if it takes some creative thinking, I urge you to sit down at the table for dinner as a family every chance you get.
Thursday, March 17, 2011
Day 9: Sugar Free & Meat Free Challenge
We survived the first week. As I suspected, following a strict vegetarian diet causes us to be deliberate about our food choices but it is very manageable. We enjoy vegetables, experimenting with new recipes, and exploring new cuisines; vegetarianism fits in nicely.
Do you know what I don't like? A sugar free life. Well, that's not true. Not that I have a week under my belt, I feel good. Those first few days were pretty rough though.
Tips I used to transition to a sugar free diet:
Do you know what I don't like? A sugar free life. Well, that's not true. Not that I have a week under my belt, I feel good. Those first few days were pretty rough though.
Tips I used to transition to a sugar free diet:
- Avoid the grocery store at all cost. One trip down those aisles (or past the bakery!) reminds you of everything that is on the "forbidden" list. Stay out of the store until you have some strong willpower accumulated.
- Hide the contraband. Better yet, get rid of it completely. When I open the pantry or refrigerator, I see wholesome foods without processed sugar. (I also know where I can find some Girl Scout cookies on Easter Sunday!)
- Prepare your alternatives. When you crave something sweet - and you will - be prepared with an alternative. For me, dried fruit helped immensely in the first few days and it was very satisfying. Be sure to select dried fruit that is not full of sugar; look for all natural products. Prunes, cranberries, apricots, and raisins helped me to get through some dark days :)
- Move on. Those sweet-tasting dried fruits helped my transition days, but I don't want to replace one sugar with another. Sugar cravings are often a result of low blood sugar. This can be corrected by adding some protein to your diet.
- Feel the goodness. After a few days without processed sugar, you might feel a little lighter, less bloated in your tummy, and have fewer mood swings. Enjoy that feeling of goodness and remember it!
Wednesday, March 16, 2011
Stone Soup
Yesterday I shared the fable of Stone Soup with the first grade class where I volunteer as part of Chefs Move to Schools. We explored some healthy vegetables and learned that we can achieve a greater good when we all work together, contributing whatever we have to offer.
I used this site for resources and inspiration including: felt board story templates and a copy of the fable.
Scroll on down for the recipe...
The Fable of Stone Soup
How to Make Stone Soup
In my home, Stone Soup usually takes on the form of leftover veggies that I need to use before they turn bad. It's a great place to dump a few stray lima beans or some fresh spinach that is hanging on for dear life. All vegetables are welcome and all contribute in their own ways!
By its very nature, each pot of Stone Soup will take on its own character. If you need a recipe to get started, here it is:
Stone Soup (6-8 servings)
Ingredients
I used this site for resources and inspiration including: felt board story templates and a copy of the fable.
Scroll on down for the recipe...
The Fable of Stone Soup
A kindly, old stranger was walking through the land when he came upon a village. As he entered, the villagers moved towards their homes locking doors and windows.
The stranger smiled and asked, "Why are you all so frightened? I am a simple traveler, looking for a soft place to stay for the night and a warm place for a meal."
"There's not a bite to eat in the whole province," they told him. "We are weak and our children are starving. Better keep moving on."
"Oh, I have everything I need," he said. "In fact, I was thinking of making some stone soup to share with all of you." He pulled an iron cauldron from his cloak, filled it with water, and began to build a fire under it.
Then, with great ceremony, he drew an ordinary-looking stone from a silken bag and dropped it into the water.
By now, hearing the rumor of food, most of the villagers had come out of their homes or watched from their windows. As the stranger sniffed the "broth" and licked his lips in anticipation, hunger began to overcome their fear.
"Ahh," the stranger said to himself rather loudly. "I do like a tasty stone soup. Of course, stone soup with cabbage - that's hard to beat."
Soon a villager approached hesitantly, holding a small cabbage he'd retrieved from its hiding place, and added it to the pot.
"Wonderful!!" cried the stranger. "You know, I once had stone soup with cabbage and a bit of salt beef as well; it was fit for a king."
The village butcher managed to find some salt beef. And so it went, through potatoes, onions, carrots, mushrooms, and so on, until there was indeed a delicious meal for everyone in the village to share.
The villager elder offered the stranger a great deal of money for the magic stone, but he refused to sell it and traveled on the next day.
As he left, the stranger came upon a group of village children standing near the road. He gave the silken bag containing the stone to the youngest child, whispering to the group, “It was not the stone, but the villagers that had performed the magic."
Moral: By working together, with everyone contributing what they can, a greater good is achieved.
How to Make Stone Soup
In my home, Stone Soup usually takes on the form of leftover veggies that I need to use before they turn bad. It's a great place to dump a few stray lima beans or some fresh spinach that is hanging on for dear life. All vegetables are welcome and all contribute in their own ways!
By its very nature, each pot of Stone Soup will take on its own character. If you need a recipe to get started, here it is:
Stone Soup (6-8 servings)
Ingredients
- 1 large, clean stone
- 1 T vegetable oil or butter
- 1 medium onion, chopped
- 2 celery stalks, trimmed and chopped small
- 1 large carrot, peeled and cut into 1/2 moons
- 3 medium red skin potatoes, chopped into bite-size pieces
- 1 bell pepper, chopped
- 1 medium zucchini, diced large
- 1/2 cup corn kernels, fresh or frozen
- 1/2 cup lima beans, fresh or frozen
- 1 cup green beans, fresh or frozen
- 1 large garlic clove, minced
- Salt and pepper, to taste
- 6 cups vegetable stock (or a mixture of stock and water)
- Scrub the stone and set aside
- Heat the oil in a large soup pot. Saute the onions for 3 minutes. Add the garlic and saute for another minute.
- Pour in the vegetable stock (and water, if using). Add the remainder of your ingredients, including the stone.
- Allow the soup to come to a boil, then reduce to a simmer. Continue to simmer the soup until the vegetable are tender, approximately 20-30 minutes.
- Season to taste with salt and pepper.
- Remove the stone and serve the soup.
Wednesday, March 9, 2011
Day 1: Sugar Free & Meat Free Challenge
Part of our Lenten observation this year involves a big change for me and Mike: we are giving up sugar.
We've been down the vegetarian road before and we generally eat very little meat, so the meat-free part of this challenge is not news worthy. Sugar free, on the other hand, will be quite a change for us. We tend to do a lot of snacking late at night, after the kids are in bed. (Hey, that stuff isn't healthy for the kids!)
To prepare for the Lenten sacrifice, many people choose to pray for strength and discipline; others gently wean their bodies off of the forbidden food. What did we do? WE ATE IT ALL!
Every chance we had (i.e. when the kids weren't looking!), we gobbled up a cheeseburger or a handful of Girl Scout cookies. We ate more meat and sugar in the last two weeks than we have in a long time. We were like bears preparing to hibernate. Ash Wednesday couldn't have come sooner.
At the end of these 40 days, I expect that we will have lost a few pounds, regained some energy, and generally feel better. I'm looking forward to sharing some of our journey with you.
Wish us luck!
Tuesday, March 8, 2011
Red Beans and Rice: A Celebration of New Orleans for Ash Wednesday
New Orleans culture crept into our family when my cousin chose Tulane for her undergraduate studies. She was excited to start her freshman year and move into her dorm in August 2005. The school forced them to evacuate. Hurricane Katrina came. Everything changed.
And so began our relationship with New Orleans. I first visited two years ago on a trip with my mom and aunts to visit my cousin during her senior year. The architecture, culture, food, and floodlines grabbed my attention.
By the time our flight landed in New Orleans, I had just read most of the book Skinny Bitch by Rory Freedman and Kim Barnouin. The convergence of these two experiences - reading the book and visiting New Orleans - resulted in my recipe for Vegetarian Red Beans and Rice.
This is a hearty, wholesome, and delicious recipe to help you celebrate the culture of New Orleans as Mardi Gras ends and we enter Lent. Enjoy!
Vegetarian Red Beans and Rice
Ingredients
 |
 |
| Unforgettable: beignets at Cafe Du Monde... luscious bits of fried dough buried under a pile of powdered sugar. |
By the time our flight landed in New Orleans, I had just read most of the book Skinny Bitch by Rory Freedman and Kim Barnouin. The convergence of these two experiences - reading the book and visiting New Orleans - resulted in my recipe for Vegetarian Red Beans and Rice.
 |
| Don't you want to climb up to this balcony to watch the parades? |
This is a hearty, wholesome, and delicious recipe to help you celebrate the culture of New Orleans as Mardi Gras ends and we enter Lent. Enjoy!
Vegetarian Red Beans and Rice
Ingredients
- 2 T olive oil
- 1 Spanish onion, chopped
- 1 red bell pepper, chopped
- 1 yellow or orange bell pepper, chopped
- 28 oz can crushed tomatoes, fire roasted
- 16 oz can diced tomatoes, fire roasted
- 2 garlic cloves, minced
- 1 bay leaf
- 2 cups vegetable stock
- 60 oz red beans
- 1 T creole seasoning such as Tony Cachere's
- 1 sprig of thyme, leaves stripped off the stem
- Black pepper and Kosher salt, to taste
- Brown rice
- In a Dutch oven or large soup pot, heat the olive oil and add the onions. Saute the onions for 3-5 minutes, allowing them to become transluscent but not brown. Add the garlic and saute another minute.
- Add the bell pepper, bay leaf, tomatoes, and vegetable stock. Simmer until the vegetables are soft.
- Add the beans and remaining seasoning. Continue to simmer another 20-30 minutes, allowing the flavors to blend.
- Taste for seasoning and adjust according to your preferences. For additional spice, add a few drops of Tabasco sauce. (I prefer the Chipotle Tabasco because it adds a hint of smoky flavor with the spice.)
- Remove the bay leaf and serve with brown rice that was prepared according to package directions.
- Allow the food to cool to room temperature.
- For best results, package the rice separately from the red beans. Use a plastic storage container, covered glass casserole dish, or plastic zip-top bag to store the food.
- Label the outside of the package with the name of the dish and the date it was frozen. I also add important notes such as "vegetarian, "vegan," or "dairy free" so I can remember how it was prepared.
- When it is time to enjoy the frozen meals, allow it to thaw in the refrigerator overnight and then heat in a pan on the stove. Add a few tablespoons of water to the rice; heat it slowly in a covered pot to restore its original fluffiness.
Thursday, March 3, 2011
Pink Bunny Birthday Party
My baby girl celebrated her first birthday in January. Can you believe how fast the time is going? We were thrilled to gather our family and friends at a local museum to eat cake, play, learn, and spend time together.
Anna loves her little pink bunny. She chews its ears, carries it around, and hugs it with all of her strength. We knew that her party needed to feature pink bunnies in honor of her little lovey.


Anna loves her little pink bunny. She chews its ears, carries it around, and hugs it with all of her strength. We knew that her party needed to feature pink bunnies in honor of her little lovey.

I planned and plotted for weeks; then I gathered all of my confidence to bake Anna's cakes.
The bunny face is a strawberry cake with 7 minute frosting and tinted coconut. I used the same directions that moms everywhere use to make Easter cakes. The cupcakes are vanilla with pink buttercream frosting.

Each month, I take a picture of the kids on the date of their birth. This is an easy way to look back on how much they are growing and changing during those first few years. Check out the guest of honor posing by the cake...what a cutie!

Pink, pink, pink everywhere! We served bunny cracker snacks and pink juice boxes.
The frames are displaying a quote I liked and a copy of the invitation.
The quote is from Jane Austen: "Where shall we see a better daughter or a kinder sister or a truer friend."

Anna's smash cake (served at home on her actual birthday) was a giant cupcake!

She loved sticking her fingers into the cake and shoving big bites of frosting into her mouth! The candle says "Baby's First Birthday" and was among my Nana's baking supplies. Anna's middle name was chosen to honor my Nana, so I loved that a little bit of her was with us.

We cut snowflakes out of pink tissue paper to decorate the tables. Each guest received a chocolate bunny sucker from Goumas Confections, our favorite local candy store.
Anna had a lot of fun at her party and I loved planning all of those little pink bunny details for her!
Tuesday, March 1, 2011
Vegetable Pizza: A Cool Snack for Kids
Last week I had the pleasure of making vegetable pizza snacks with the 2nd grade class where I volunteer with Chefs Move to Schools.
The kids were skeptical at first about some of the raw vegetables I asked them to eat...mushrooms, zucchini, tomatoes, cauliflower. However, I challenged each of them to try one tiny bite of something new or something they thought they wouldn't like. And you know what? They did it. And they liked it. Sometimes just trying a new food is half the battle, so I was incredibly proud of these kids.
How to involve kids in the kitchen:
Ingredients
Crust: homemade pizza crust is preferred; alternatives: Pillsbury Crescent Rolls, refrigerated pizza dough, English muffins
16 oz cream cheese, softened
1 cup sour cream
2 T dry Ranch dressing mix (see recipe below to make your own)
2 1/2 cups chopped vegetables - choose the veggies you like the most! I like to use carrots, broccoli, cauliflower, zucchini, tomatoes, mushrooms, red bell pepper, and green onions
Directions
Bake and cool the crust according to recipe/package directions. This is traditionally made on a cookie sheet, but it is also fun to make mini-pizzas but cutting the crust into squares or circles.
In a medium bowl, mix the cream cheese, sour cream, and dry Ranch dressing.
When the crust is cool, spread the cream cheese mixture evenly over the crust. Top with the vegetables and chill in the refrigerator until ready to serve.
To make your own Ranch Dressing Mix:
Combine ingredients and store in an airtight container:
Chefs Move to Schools is a program within Let's Move! and is part of the First Lady's initiative to end childhood obesity within one generation. Chefs from all over the country are working with schools to provide education, counseling, and support. We want our kids to have healthy meals at school and to make healthy decisions at home.

The kids were skeptical at first about some of the raw vegetables I asked them to eat...mushrooms, zucchini, tomatoes, cauliflower. However, I challenged each of them to try one tiny bite of something new or something they thought they wouldn't like. And you know what? They did it. And they liked it. Sometimes just trying a new food is half the battle, so I was incredibly proud of these kids.
How to involve kids in the kitchen:
- Chop a variety of vegetables, put them into bowls, and set up a "vegetable bar" where kids can decorate their own pizzas with the colors, flavors, and designs that appeal to them.
- Shop together at the grocery store for vegetables that interest the children. Look for a variety of colors, shapes, and textures to encourage their interest.
- Use this opportunity to introduce a new vegetable. None of the individual flavors stand out in this recipe, so it is a chance to ease kids into the idea of trying new foods.
- Assemble the pizza on the weekend or in the evening when you have more time. Cut it into squares and it will be ready to eat after school or added to your school lunch.
Ingredients
Crust: homemade pizza crust is preferred; alternatives: Pillsbury Crescent Rolls, refrigerated pizza dough, English muffins
16 oz cream cheese, softened
1 cup sour cream
2 T dry Ranch dressing mix (see recipe below to make your own)
2 1/2 cups chopped vegetables - choose the veggies you like the most! I like to use carrots, broccoli, cauliflower, zucchini, tomatoes, mushrooms, red bell pepper, and green onions
Directions
Bake and cool the crust according to recipe/package directions. This is traditionally made on a cookie sheet, but it is also fun to make mini-pizzas but cutting the crust into squares or circles.
In a medium bowl, mix the cream cheese, sour cream, and dry Ranch dressing.
When the crust is cool, spread the cream cheese mixture evenly over the crust. Top with the vegetables and chill in the refrigerator until ready to serve.
To make your own Ranch Dressing Mix:
Combine ingredients and store in an airtight container:
- 1 1/2 T dried parsley
- 1/2 T dried chives
- 1/4 T dried tarragon
- 1/2 T lemon pepper
- 1 T salt
- 1/4 T oregano
- 1/2 T garlic powder
Chefs Move to Schools is a program within Let's Move! and is part of the First Lady's initiative to end childhood obesity within one generation. Chefs from all over the country are working with schools to provide education, counseling, and support. We want our kids to have healthy meals at school and to make healthy decisions at home.

To learn more about Let's Move! and Chefs Move to Schools, please visit www.letsmove.gov.
Sunday, February 27, 2011
Get Me To The Church On Time
I won't lie. Cooking from scratch and feeding your family whole foods can be difficult. It's time consuming. It takes planning and work and discipline. In the end, it is so worth it.
Sunday mornings have proved to be especially challenging for my family because we need to make and serve both breakfast and lunch with very little prep time.
These days can bring out the worst in us. We wake up, race around the house trying to make everyone clean, well-dressed, and well-fed so we can get out the door in time for church.
We pray, feel good, and love each other...until we get home.
Then we rush around, changing clothes, making lunch, fighting off naps and tired kids, snapping at each other out of stress. Crazy stuff. Something had to give.
Planning our breakfast and lunch for Sunday has been a big stress-reliever. I'm sharing some tips here with the hope they can help you with some healthy food in the midst of chaos, whether you are heading to church on a Sunday morning, story time on Wednesday, or basketball practice on Saturday.
If you have some tips, please leave them in the comments so we can all benefit!
Use Your Kitchen Wisely
Cook Now, Eat Later
Let Go
Sunday mornings have proved to be especially challenging for my family because we need to make and serve both breakfast and lunch with very little prep time.
These days can bring out the worst in us. We wake up, race around the house trying to make everyone clean, well-dressed, and well-fed so we can get out the door in time for church.
We pray, feel good, and love each other...until we get home.
Then we rush around, changing clothes, making lunch, fighting off naps and tired kids, snapping at each other out of stress. Crazy stuff. Something had to give.
Planning our breakfast and lunch for Sunday has been a big stress-reliever. I'm sharing some tips here with the hope they can help you with some healthy food in the midst of chaos, whether you are heading to church on a Sunday morning, story time on Wednesday, or basketball practice on Saturday.
If you have some tips, please leave them in the comments so we can all benefit!
Use Your Kitchen Wisely
- Oven: After 3+ years, I just figured out that my oven has a "Delay Start" option. I can set the time I want it to turn on so it is pre-heated when I walk in the door from church or wake up in the morning.
- Slow Cooker: Crock Pots are for more than just roasts! You can make oatmeal, egg casserole, and even pancakes in your slow cooker. Search the internet for recipe options or check out A Year of Slow Cooking for some tried and true recipes.
- Toaster: Make large batches of homemade waffles or pancakes and freeze them. When you need a quick breakfast, pop one in the toaster. You have all the convenience of a packaged, frozen meal from the grocery store without all of the yucky stuff in it.
- Freezer: When you bake muffins, make quiche, or generally have any leftovers around, freeze them. There will be a morning when you can pull out two slices of frozen quiche and feel that it saves your entire day.
Cook Now, Eat Later
- Waffles & Fruit: My husband makes a big batch of homemade waffles on Saturday nights after the kids go to bed. I like to make a warm compote or puree using fruit from the freezer. In the morning, we toast the waffles and top them with fruit. Our whole family LOVES these waffles; they are healthy but taste like a fabulous treat.
- Something in a Casserole Dish: Last I made Vegetarian Brunch Taquitos using scrambled eggs and leftover veggies. You can enjoy the same flavors using my recipe for enchiladas. If you have other leftovers hanging around, put them in a 9x13 glass baking dish, cover with plastic wrap, and refrigerate. Pop the entire dish in the oven to reheat. This takes less hands-on time than using the microwave to heat several dishes and usually produces a nicer result.
- Muffin Tin Breakfast: Use the muffin tin idea and apply it to breakfast! Fill up the tins the night before with fresh fruit, yogurt, or cottage cheese. In the morning, toast a piece of wheat bread, spread peanut butter on it, and cut the toast into sticks for easy eating.
Let Go
- Cold Cereal/Granola: Allow one of the meals to be something easy that can be thrown on the table in one minute or less. In our house, this is usually my homemade granola on top of yogurt or Cheerios with bananas.
- Restaurant: Sometimes I surrender and we head to a favorite local restaurant for brunch. Andrew eats pancakes (surely made without whole wheat flour *gasp*) and Mike drinks Pepsi. Yet we find ourselves with full tummies and more time with people we love. Totally worth it.
- PB&J: Do you agree that peanut butter and jelly sandwiches are great around the clock? I love them with coffee.
Friday, February 18, 2011
Big Flavors for Little Palates: Muffin Tin Meals
Lunches frustrate me. I get bored, the food gets monotonous, and the kids get whiny. Let's also factor in that creating a fresh, healthy lunch in the middle of the day requires us to stop our fun activities and focus on food. They're hungry and impatient. I am too.
So last summer when I finally stumbled across Muffin Tin Mom, I embraced the idea to invigorate our lunchtime routines. Armed with two pans of 6-cup muffin tins (undoubtedly inherited from my grandma), I made my first "Dippy Lunch" for Andrew. He loved it! These little ones love to dip things and mommas love when they eat lots of healthy vegetables...so it was win-win for everyone!
How to Make a Dippy Lunch for Hungry Munchkins
On this particular morning, they both enjoyed blueberries, bananas, and whole wheat cinnamon raisin toast. Andrew's toast was cut into sticks and Anna's as cut into bite-size quares.
One of our great go-to lunches in a muffin tin is:
So last summer when I finally stumbled across Muffin Tin Mom, I embraced the idea to invigorate our lunchtime routines. Armed with two pans of 6-cup muffin tins (undoubtedly inherited from my grandma), I made my first "Dippy Lunch" for Andrew. He loved it! These little ones love to dip things and mommas love when they eat lots of healthy vegetables...so it was win-win for everyone!
 |
| Left: Andrew's Dippy Lunch Right: Anna's Munchy Lunch |
- Start with a muffin tin. I like to use the ones with 6 cups, but you can use anything! Find fun shapes top fit the season, fill 12 cups with smaller portions, or fill some mini-tins with tiny portions.
- Choose your dip. For the lunch pictured above, we used Ranch dressing. Other favorites include hummus and yogurt.
- Chop your veggies. This is a great time to introduce a new veggie because the presentation is fun and they might be distracted. I like to make a salad for my own lunch and then use those same ingredients in the muffin tin to make a "deconstructed salad" for Andrew. To make it friendly for older babies & younger toddlers, simply steam those veggies to soften them a bit.
- Add something fun. For this lunch, it was an assortment of yummy berries. Other ideas include yogurt, apple slices, pitas, or wheat crackers.
 |
| Valentine's Day Breakfast |
One of our great go-to lunches in a muffin tin is:
- Hummus on whole wheat pitas (Andrew gets triangles; Anna has small bite-size squares)
- Carrots (Sticks for Andrew and steamed chunks for Anna)
- Apples (Slices for Andrew and steamed chucks for Anna)
A few reasons why I love making meals (especially lunches) in muffin tins:
- Variety - We all get stuck in food ruts. The kids get bored eating the same foods in the same ways and we get bored when we continue to make the same things for them to eat. Lunch is an especially difficult meal for me to execute with the kids, but the tins get my creative juices flowing again.
- Serving sizes - Each cup is somewhere near a serving size for a toddler, give or take a little. This forces you to think earnestly about the fruit & veggies that are going into those little tummies.
- Quick preparation - You can easily line up a couple muffin tins to drop in little lunch bites. This is a great place to use up the last bits of fruit, veggies, cheese, & yogurt that are hanging out in the refrigerator. Does it seem too small for a full meal? That little piece of leftover chicken might be the perfect size to fill a muffin cup!
- Holiday themes - Add it to your holiday festivities by purchasing the silicon muffin tins in shapes: hearts, stars, shamrocks, trees, etc. (My Valentine's Day heart pans came from the dollar bins at Target for only $2.50 each.)
Wednesday, February 16, 2011
Personal Chef Service: 5x4 Package
There are many great options that I offer to my customers. Everything from freezer meals to fresh service, from catered parties to cooking demonstrations.
One of the most popular services is what I call a 5x4 Package: The client benefits from 5 entrees/side dishes, with 4 servings of each selection. (That is a total of 20 meals, in case you are counting!)
Each one of those meals is packaged, labelled, and tucked into their freezer. After a busy day, my clients can come home, heat up a homemade meal, and relax. No messy kitchen. No pots to wash. Virtually stress-free.
Last week I cooked for one of my newest clients and thought you might enjoy a quick peek into my day.
First, there was a car there to help me. On this particular day, Andrew selected Flo (from the movie "Cars") to be my special helper.

I never turn on the TV when I cook because it is too distracting. However, this was shaping up to be a long day I yearned for a few distractions. Imagine my glee when I found Colin Cowherd's radio show on TV! I love listening to this guy. It's not because I have a clue what he's talking about or even an opinion on the subject; I enjoy his conviction, his wit, and his voice. Loved it.

After a loooong day of cooking, here was the result:

5x4 Package = 20 Meals
Menu:- Classic Meatloaf with Honey Dijon Carrots and Spinach & Wild Rice Casserole
- Mexican Tortilla Casserole with Jalapeno Cornbread
- Shepherd's Pie
- Flank Steak Roll-Ups with Bacon, Roasted Green Beans, and Garlic Mashed Potatoes
- Vegetarian Lasagna with Mediterranean Salad
Tuesday, February 15, 2011
Welcome to Community Supported Agriculture!
A little note arrived in my inbox last weekend. It held so much promise and I was just bursting to say "Yes!" as soon as I saw it.
The email came from my favorite farmer and he invited us to buy a share in his farm's CSA. I love the romantic notion of supporting local farmers but I also love the hint that spring could be right around the corner. This note assures me that someone is thinking about how many crops to plant and chickens to feed. In the middle of another gloomy and gray winter week, I am desperate to hang onto this hope for warmth and sunshine.
Right now you might be asking....
What is Community Supported Agriculture?
"Over the last 20 years, Community Supported Agriculture (CSA) has become a popular way for consumers to buy local, seasonal food directly from a farmer. Here are the basics: a farmer offers a certain number of "shares" to the public. Typically the share consists of a box of vegetables, but other farm products may be included. Interested consumers purchase a share (aka a "membership" or a "subscription") and in return receive a box (bag, basket) of seasonal produce each week throughout the farming season." Source
Lovely. Count me in. We decided to purchase the large share from TerraVita Farms. The box feeds 3-4 people and the average weekly cost will be $27.50. (The full amount is due at the beginning of the season.) Last summer, I budgeted $20 for each trip to the farmer's market and then filled in gaps with additional purchases at the grocery store. Even though $550 paid up front feels like a lot of money, it really does fall in line with our typical grocery budget for fresh veggies in the summer.
Think about the excitement every week (for 20 weeks!) when I stop by the Granville Farmer's Market to pick up our box of vegetables, eggs, honey, and flowers. We eat tons of vegetables and we love the adventure of trying new ones, so the spirit of the unknown is quite exciting.
I love the notion of knowing that my food was grown 5 miles from my house. Organic? Local? Natural? Check! Check! Check!
Take action my friends!
Are you interested in finding your own CSA? Please visit http://www.localharvest.org/ to find the options available in your area. You can enter your zip code to select farms near your home. Browse through the farms' website, learn about their farming practices, and select the right price range for you. If you live locally and are interested in TerraVita Farms, please see their website for all of the information.
Monday, February 14, 2011
Homemade Play Dough
There is an ad on TV now that says something like: "Valentine's Day isn't about saying 'I love you,' it's about saying 'I love us.'" I love that idea. I love that idea more than I love a lot of the hoopla around today.
To kick off our Valentine's Day celebrations, I made Play Dough with the kids...because I love us all together. We have tons of the store-bought kind tucked in bins and cuddled next to mini-cutters of all shapes. But that experience pales in comparison to mixing it yourself...
And selecting the perfect color...

Then squishing your hands into the warm dough...
 Nothing compares.
I still remember the smell and warmth of the Play Dough that Nana and I created in her kitchen when I was little. It's so important that my kids have memories like that too.
Benefits of making your own Play Dough:
Ingredients
3/4 cup flour
1/2 cup salt
1 1/2 teaspoons alum
1 1/2 teaspoons vegetable ooil
1/2 cup coiling water
food color, sprinkles, glitter, scents, etc (optional)
Directions
In a medium bowl, mix together flour, salt, and alum. Add the oil and boiling water; stir until blended. Roll the dough out onto a flat surface and knead in the color, if desired. Cool and store in an air-tight container.
(Note: I doubled the recipe to make enough Play Dough for the three of us to share.)

Try the recipe, have some fun with it, and let me know what you loved most about it!
To kick off our Valentine's Day celebrations, I made Play Dough with the kids...because I love us all together. We have tons of the store-bought kind tucked in bins and cuddled next to mini-cutters of all shapes. But that experience pales in comparison to mixing it yourself...

And selecting the perfect color...

Then squishing your hands into the warm dough...

I still remember the smell and warmth of the Play Dough that Nana and I created in her kitchen when I was little. It's so important that my kids have memories like that too.
Benefits of making your own Play Dough:
- It's fun
- Kids like to choose their own colors and add in textures like glitter or sprinkles
- Customize the colors for the holiday or event you are celebrating
- Avoid allergens or artificial coloring found in manufactured Play Dough
- Last, but not least....the warm squishy dough when you knead it yourself. Can't be beat!
Ingredients
3/4 cup flour
1/2 cup salt
1 1/2 teaspoons alum
1 1/2 teaspoons vegetable ooil
1/2 cup coiling water
food color, sprinkles, glitter, scents, etc (optional)
Directions
In a medium bowl, mix together flour, salt, and alum. Add the oil and boiling water; stir until blended. Roll the dough out onto a flat surface and knead in the color, if desired. Cool and store in an air-tight container.
(Note: I doubled the recipe to make enough Play Dough for the three of us to share.)

Nana's Recipe Card for Play Dough
Try the recipe, have some fun with it, and let me know what you loved most about it!
Monday, February 7, 2011
Cooking with Beau & Bella
I'm cooking weekly for a new client who appreciates fresh vegetables, fine food, and healthy living. There are new recipes to try, fabulous grocery stores to frequent, and fishmongers to befriend. I certainly can't do this alone. Luckily, they even supply me with some trusty sous chefs to get the job done. Meet Beau and Bella...


It's great fun to start each week with a trip to Whole Foods (out of my way and yet incredibly worth the drive!) and a day cooking in a beautiful kitchen. Oh, and don't forget my sous chefs, Beau and Bella...they make me smile all day long!

They love to snack on vegetables and they come running when they smell rice. Their inquisitive little noses make me smile throughout the day.
Each week, I develop a new menu drawn largely from the Canyon Ranch recipe collection. This is proving to be a fun way to expand my "usual" recipes and continue exploring healthy food options. We have agreed on three dinners and some snacks/lunch items. This week's menu included:
- Turkey Medallions with Honey Chipotle Sauce, Sauteed Kale, and Potato Medley
- Maple Glazed Sea Bass with Root Vegetables; Couscous; Arugula Salad with Walnut Vinaigrette
- Japanese Stir-Fry Vegetables with Edamame; Mongolian BBQ Sauce
- Pumpkin Crunch (roasted pumpkin seeds with dried cranberries...amazing!)
- Granola
- Winter Fruit Salad
At the end of the day, all of the food was tucked in the refrigerator and labelled with heating/serving instructions:

It's great fun to start each week with a trip to Whole Foods (out of my way and yet incredibly worth the drive!) and a day cooking in a beautiful kitchen. Oh, and don't forget my sous chefs, Beau and Bella...they make me smile all day long!
Tuesday, February 1, 2011
Winter Storm Food
There is a big snow and ice storm inching its way across the Midwest right now. My lights were flickering earlier in the evening, prompting us to search out extra flashlights and candles. My husband asked if we should brew some coffee and keep it warm in a thermal carafe for the morning.
Mike was half-kidding about the coffee, but it got me thinking...If the power goes out in the middle of the night, I would LOVE to have a nice hot meal to feed the kids for breakfast. There would be enough stress trying to figure out our Plan B: packing to stay at my parents' house (they have a generator), manually opening the garage door, ensuring our pipes don't freeze, navigating the icy driveway, etc.
Food is always on my mind, so here is my suggestion for an easy, warm meal just in case the power goes out:
Pumpkin Pie Oatmeal in the Crock Pot
Ingredients
4 cups milk/water (I like to use 2 cups soymilk and 2 cups water)
2 cups oats
1 cup canned pumpkin puree
1/2 cup raisins
1 teaspoon cinnamon
1/4 teaspoon nutmeg
1/8 teaspoon allspice
1 teaspoon vanilla extract
Directions
Mix all ingredients together in the Crock Pot and turn on low. That's it. So easy, right?
Please note...I am not a big fan of oatmeal made in the Crock Pot. However, I absolutely love my recipe for "Pumpkin Pie Oatmeal" (we eat it all the time!) and I love the idea of a nice hot breakfast in the middle of a nasty ice storm.
I hope this note finds you warm, safe, and nourished!
Pupcakes
Today is my Chloe's 8th birthday! Chloe has been through a lot and we are grateful for every birthday we get to celebrate with her.
This is one of our favorite pictures of Chloe when she was younger. We call it her "Senior Picture" because she is posing with her sports equipment, just like a high senior.

She picked me out right away when we first met. When I brought her home, her tiny collar was too big for her little neck. She was scared to leave the patio; she cried at night and I held her in my arms. She is a friend, a playmate, a kisser of boo-boos, and a healer of sad hearts. She is thrilled to see us everyday when we come home, she is patient when we are busy, and she is excellent at taking naps.
To show Chloe how much we love her, I baked her a very special cake. The primary flavor is peanut butter - her favorite. There are also some carrots for vitamins, honey for sweetness, and vanilla for flavor. (Any person would love to eat this cake, I am sure!) The warm peanut butter smell took over our entire kitchen and smelled so amazing.

Here is the recipe I use for Chloe's birthday cake:
Chloe's Peanut Butter Carrot Cake
Ingredients
1 cup whole wheat
1 t baking soda
1/4 c peanut butter
1/4 c vegetable oil
1 c shredded carrots
1 t vanilla
1/3 cup honey
1 egg
Directions
Mix flour and baking soda in a medium bowl. Add the remaining ingredients and stir until the batter is moistened. Pour the batter into the cake pan. Bake for 30 minutes. Remove cake from pan and cool on a wire rack.
Serving Suggestions
Another reason why we love Chloe so much...she loves us! Here she is giving Andrew a big ol' kiss when he was just a little guy. Happy birthday Chloe!

This is one of our favorite pictures of Chloe when she was younger. We call it her "Senior Picture" because she is posing with her sports equipment, just like a high senior.

She picked me out right away when we first met. When I brought her home, her tiny collar was too big for her little neck. She was scared to leave the patio; she cried at night and I held her in my arms. She is a friend, a playmate, a kisser of boo-boos, and a healer of sad hearts. She is thrilled to see us everyday when we come home, she is patient when we are busy, and she is excellent at taking naps.
To show Chloe how much we love her, I baked her a very special cake. The primary flavor is peanut butter - her favorite. There are also some carrots for vitamins, honey for sweetness, and vanilla for flavor. (Any person would love to eat this cake, I am sure!) The warm peanut butter smell took over our entire kitchen and smelled so amazing.

Chloe's Peanut Butter Carrot Cake
Ingredients
1 cup whole wheat
1 t baking soda
1/4 c peanut butter
1/4 c vegetable oil
1 c shredded carrots
1 t vanilla
1/3 cup honey
1 egg
Directions
Mix flour and baking soda in a medium bowl. Add the remaining ingredients and stir until the batter is moistened. Pour the batter into the cake pan. Bake for 30 minutes. Remove cake from pan and cool on a wire rack.
Serving Suggestions
- Place the cake in the dog bowl and watch their tails wag!
- Cut into wedges and serve a little each day as a treat
- Cut a small piece and serve with a cup of Frosty Paws
- Use a large round cookie cutter to cut circles out of the cake, thus making smaller "Pupcakes"
- Drizzle plain yogurt on top for the "icing" and garnish with diced bell peppers or tomatoes
Another reason why we love Chloe so much...she loves us! Here she is giving Andrew a big ol' kiss when he was just a little guy. Happy birthday Chloe!

Subscribe to:
Posts (Atom)